Wednesday, 30 April 2014

Having fun with Headpins


Yep I've been making some headpins.

I love making headpins, I wasn't sure how to make them in the beginning as I didn't know the best way to hold the wire while I added the glass. So I chatted to a few fellow lampworker friends and came up with using scrap wire and wrapping them onto a mandrel with it.

This works really well but is a bit time consuming getting them prepared. I saw Linda from Earthshine Beads on fb showing a photo of her demoing at a show at the weekend and she was using a pin vice to hold the wire. I think I might try it out and see how that goes!  So thank you to Linda for that idea, very helpful.


Dark Multicolour glass by Riechenbach
I love this glass one of my favourites at the moment, made by Riechenbach Dark Multi is a reactive glass but it just reacts in the flame with not much or no effort at all really, it just does what it does, just like MAGIC!!
                                    

Right then, I made drop headpins first the browny/red ones at the top, then I made the bluey, greeny, purpley ones next (Yes it really is the same glass) then I made the leaves at the very top of the above photo and they had more greens in them, with some brown and purples too.  In the first photo at the top of this post you can see some ivory beads and these have some d.multi dots and trails on them.


Now I went off to this years Flame-off in Uttoxeter a couple of weeks ago, had a great time because it is a lampworkers convention which happens once a year (not often enough).  It is an event for glass beadmakers hosting demos, supplies, beadmakers selling their own beads and the torch area, so we can get our fix if necessary and beginners can try out torches and have a go at making a bead or two possibly for the first time! I took a turn at helping out on the torches this year and really enjoyed helping some complete beginners make their first bead and a few others who needed some help with how to control the glass and even reshaping a bead for a lovely lady called Beryl.  It was such fun I may do it again next year. Some of the demos were fabulous and I did end up buying a few 'keepers' from some of the many artists there!

I stocked up on many different things but of course I couldn't come away without buying some lovely glass!! Oh boy was there some lovely, gorgeous and definitely delicious glass. 

CIM glass is my favourite glassmakers and they have some lovely new colours, below is one of them but its not quite come out a very good colour likeness. It still looks gorgeous but I will try and get a better photo tomorrow.  Sadly both of these headpins have cracked.  I don't think I got them into the bubbles quick enough as well as I may have pushed them to far into the bubbles and maybe they were touching the side of the bowl.  I always batch anneal my headpins as I always put them on the bottom of the kiln floor, instead of putting them into the kiln while I am making them.   


CIM Poseidon 


Must make some more as I love this new colour, which the name escapes me right now!!!  
Updated above ....

There are some lovely new oranges, pinks, lilac and all with great names for them as well.  Sunset, Frangipan (pink), Alleycat (orangey/yellow), Trade Winds (very dark blue), Gypsy (very dark purple), Rudolph (red), just to name a few!


So lots of making to do and some photos to take as well.


I will see you again very soon.


E x


Updated with names!   8.5.14


Tuesday, 15 April 2014

Top Tip Tuesday ~~ Tutorial ~~ How to make Wrapped Loops

How to make:  Wrapped Loops


You will need:

Wire cutters
Round nose pliers
Flat nose pliers
Chain nose pliers

Head pin
Beads


1.  Onto a headpin place on desired bead(s), do not trim headpin as you did in the turned loop.


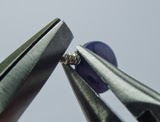
2.  Grasp the headpin with round nose pliers, approx. 4mm above the bead


3. Start to pull the wire around the blade of the round nose pliers, using your fingers or chain/flat nose pliers, to form the loop.


4. The wires should cross over


bend back the upright wire to centralise the loop (as in the turned loop)             


Tip: At this point you need to attach to the chain and/or earwire, if do not want to use a jump ring to attach the bead component.


5. Now take the chain nose pliers and hold the loop,


Grasp the loose end with a second pair of pliers (I use flat nose pliers but you can use whatever you have), pull this wire around the upright wire; ensuring this wire is perpendicular to the upright wire.


Tip:  If the wire is not perpendicular you will get sloping or diagonal wraps and they may not be neat and tidy. Using the flat nose pliers, straighten this wire so it sits perpendicular.


6.  Continue to wrap the wire around the upright until you get to the bead, the usual amount of wraps is 3 but it can be any number you want it to be, you are only limited by the length of wire left on the headpin.


Tip: While winding take the wire to the top (still holding the loop with the chain nose pliers), let go with the flat nosed pliers and reposition your hand by grasping the wire from the back and carry on by pulling the wire round and towards you 


and up 


let go again and reposition as before to pull upwards to the top once again


Don’t try and complete a wrap all in one go!


7.  Take the cutters and trim off the wire end as close to the base wire as possible.


Tip: You may need to straighten the loop after the wraps are complete as it can sometimes tip over slightly. Put the round nose pliers back into the loop to do this, as if re-turning it again.


Also the base wire can bend over slightly, just use your flat-nose pliers to straighten the loop so it becomes upright again.  


8.  Take the chain and/or flat nose pliers and tuck the end in by squeezing it down


slowly moving round the wire so no more wire is sticking out, until it is neat.


A Wrapped Loop


The wrapped loop is a little difficult to get right but with practice will become easier.


I hope you find this tutorial helpful and if you have any difficulties or any questions please contact me, I am happy to help.


Once you have mastered the wrapped loop, it is a very useful skill to have and can be used in many different ways within different types of jewellery making, earrings are a very common use but can also be used in bracelets, pendants/necklaces for linking or connecting components together, maybe in brooches and even in other types of accessories.


Bangle on a wire, connection to chains.


Beaded Finial on the clasp of a bangle


Necklace - Beads on a wire, connection to chain


Bookmark -  Connections between beads


Next time I will cover Coiling (I do not use a Gizmo) all done by hand.


Until then lots of practising required.  80))


E x


Saturday, 12 April 2014

Torch has been lit!!

Yes siree, I finally lit my torch for the first time this year. 

I cant believe its taken me this long to do it.  

Well I did have a reason .......... Flame-Off.

This is the annual UK lampworkers event, its a convention with torches, beadmaking supplies, lampworkers village and most importantly demos by famous lampworkers from around the world.

I usually go every year, its fab, Shopping and demos all in one place. Heaven!!
Well its is to other lampworkers anyway.

So I needed the practice, get me going again........  about time I hear you cry!!!  
Maybe eh???


So this was Tuesday --- Today I am here!  At last 80))


I will try and get some pictures to show you!! And of my purchases too!!


HAVING A LOVELY TIME!!


Right off to bed now more shopping to do in the morning.   80))


E x